Creating views, bind data to lists, interact with user etc is task that an Activity have to take care. We will have a deeper look to this class. Before continuing you have to install Android Studio, used on this tutorial and create a DemoApp.
What is an Activity?
The Activity class takes care of creating a window for you in which you can place your UI. Typically, applications have one
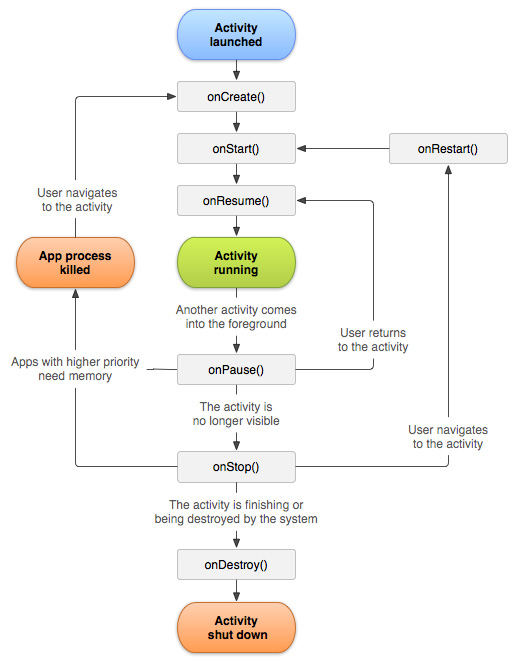
or more activities, almost all activities interact with the user. There are two methods you must implement in Activity. onCreate(Bundle) where your activity is initialized and onPause() method. To understand better the following diagram shows the important state paths of an Activity.
Activity Lifecycle
An activity has essentially four states:
- If an activity in the foreground of the screen (at the top of the stack), it is active or running.
- If an activity has lost focus but is still visible (that is, a new non-full-sized or transparent activity has focus on top of your activity), it is paused. A paused activity is completely alive.
- If an activity is completely obscured by another activity, it is stopped. It still retains all state and member information, however, it is no longer visible to the user so its window is hidden and it will often be killed by the system when memory is needed elsewhere.
- If an activity is paused or stopped, the system can drop the activity from memory by either asking it to finish, or simply killing its process.
Layout
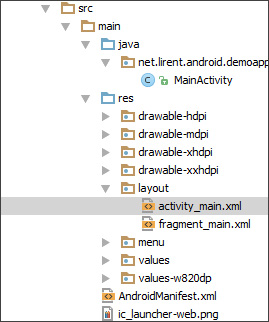
After we have created a new Activity we will not see anything on the screen. For this we need some resources. The Android applications resources are stored most of the case under the /res sub-directory.
/layout sub-directory will store our interface layout file. View details are stored in XML file. When we created our new DemoApp, we have choose to create automatically a new Activity so we have already activity_main.xml file. If not to create a new layout file on Android Studio, we have to right click under layout and select New Layout Resource File.
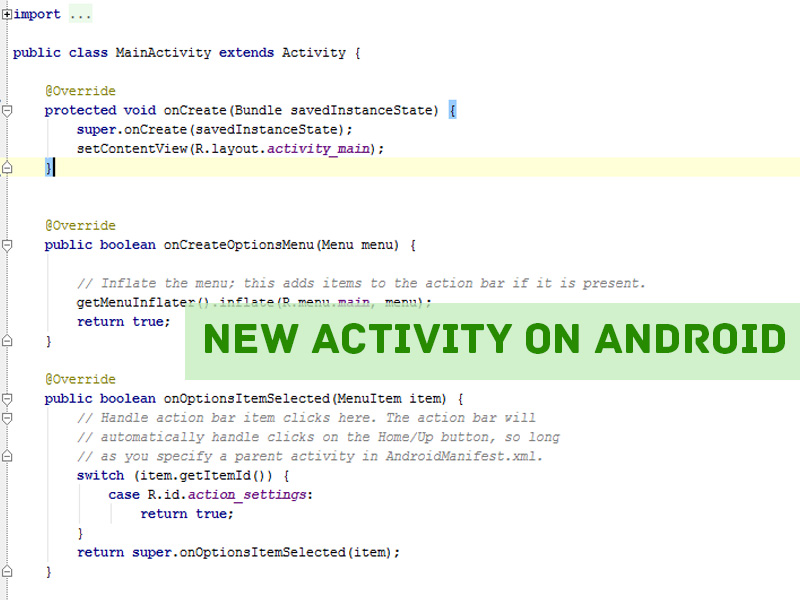
MainActivity.java
public class MainActivity extends Activity {

@Override
protected void onCreate(Bundle savedInstanceState) {
super.onCreate(savedInstanceState);
setContentView(R.layout.activity_main);
}
From MainActivity class we give as parameter our Layout XML file on setContentView method. As layout is a resource we can access it using resource ID R.layout.activity. Doing this we can transform XML elements to become View Objects.
Second Activity
Adding Another Activity we have to Make sure that SecondActivity extends Activity class. After overriding onCreate and adding second layout on SetContentView method, we have to add also to register the new Activity on AndroidManifest.xml file.
<actvity android:name=".SecondActivity" />
On next tutorial we will learn how to call SecondActivity.
SecondActivity.java
public class SecondActivity extends Activity {
@Override
protected void onCreate(Bundle savedInstanceState) {
super.onCreate(savedInstanceState);
setContentView(R.layout.second);
}
}
second.xml
<?xml version="1.0" encoding="utf-8"?>

<LinearLayout xmlns:android="http://schemas.android.com/apk/res/android"
android:orientation="vertical" android:layout_width="match_parent"
android:layout_height="match_parent">

<TextView
android:layout_width="wrap_content"
android:layout_height="wrap_content"
android:text="Hello Second Activity!"
android:id="@+id/textView" />
</LinearLayout>


[…] In this Android Tutorial series, we will have some fun creating Buttons with listeners. So when we click (touch) a button some message will display or an action will be executed. Make sure you already read the Android Activity part. […]
[…] Settings inside your app allow uses to modify features and behaviors. When application is relaunched certain information are still stored. Of course we can provide a default value for each settings voice. To provide settings for your app, we can use Preference APIs to build an interface that’s consistent with the user experience in other Android apps. […]