

When you start your computer after some upgrade you are coming from a dual boot, you may receive one or the following error message:
Invalid Boot.ini
Windows could not start because the following file is missing or corrupt
This issue may occur if the Boot.ini file is missing, damaged, or contains incorrect entries.
How to resolve this issue? Before to start I will suggest a boot.ini back up!
Save a Backup Copy of Boot.ini
1.Right-click My Computer, and then click Properties.
-or-
Click Start, click Run, type sysdm.cpl, and then click OK.
2.On the Advanced tab, click Settings under Startup and Recovery.
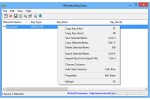
3.Under System Startup, click Edit. This opens the file in Notepad ready for editing.
4.In Notepad, click File on the Menu bar, and then click Save As.
5.Right click in an empty area of the Save As dialog box, point to New in the context menu, and then click Folder.
6.Type a name for the new folder, for example temp, and then press the ENTER key to create the folder named temp.
7.Double-click the new folder named temp, and then click the Save button to save a backup copy of the Boot.ini file
RESOLUTION
Start the computer from the Windows XP CD, start the Recovery Console, and then use the Bootcfg.exe tool to rebuild the Boot.ini file. To do this, follow these steps:
1.Configure the computer to start from the CD-ROM or DVD-ROM drive. For information about how to do this, see your computer documentation, or contact your computer manufacturer.
2.Insert the Windows XP CD-ROM into your CD-ROM or DVD-ROM drive, and then restart your computer.
3.When you receive the “Press any key to boot from CD” message, press a key to start your computer from the Windows XP CD-ROM.
4.When you receive the “Welcome to Setup” message, press R to start the Recovery Console.
5.If you have a dual-boot or multiple-boot computer, select the installation that you have to use from the Recovery Console.
6.When you are prompted, type the administrator password, and then press ENTER.
7.At the command prompt, type bootcfg /list, and then press ENTER. The entries in your current Boot.ini file appear on the screen.
8.At the command prompt, type bootcfg /rebuild, and then press ENTER. This command scans the hard disks of the computer for Windows XP, Microsoft Windows 2000, or Microsoft Windows NT installations, and then displays the results. Follow the instructions that appear on the screen to add the Windows installations to the Boot.ini file. For example, follow these steps to add a Windows XP installation to the Boot.ini file:
a.When you receive a message that is similar to the following message, press Y:
Total Identified Windows Installs: 1
[1] C:\Windows
Add installation to boot list? (Yes/No/All)
b.You receive a message that is similar to the following message:
Enter Load Identifier
This is the name of the operating system. When you receive this message, type the name of your operating system, and then press ENTER. This is either Microsoft Windows XP Professional or Microsoft Windows XP Home Edition.
c.You receive a message that is similar to the following:
Enter OS Load options
When you receive this message, type /fastdetect, and then press ENTER.
Note The instructions that appear on your screen may be different, depending on the configuration of your computer.
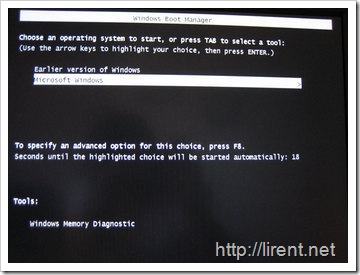
9.Type exit, and then press ENTER to quit Recovery Console. Your computer restarts, and the updated boot list appears when you receive the “Please select the operating system to start” message.
For more information’s please visit support.microsoft.com
Thanks for your help
dude i need help my laptop cant enter recovery system it cant detect my hard disk. what should i do?. thanks